Petra's Apron

Chloe and Petra with apron

“So I’m really bad at blogging lately.” Usually I don’t mind keeping a buffer for the times when I’m not creative, but I’ve been prolific lately (I even knit two things that will never make it to the blog!). So expect a DELUGE of crafts, because at this rate it would be dumb to be like “Here are some gloves I knit” when it’s June.

Full body apron

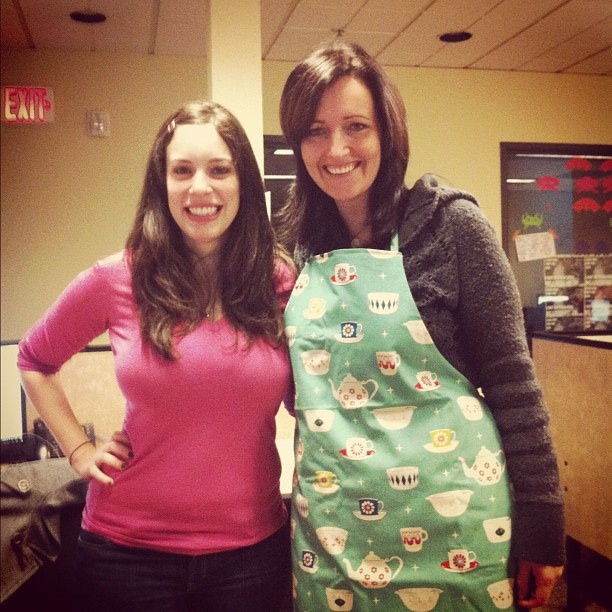
This is an apron I sewed for my colleague and close friend <a href=”http://petragregorova.com/ class=”url” rel=”friend met co-worker”>Petra, who is a masterful and generous cook. I made it for her birthday. Her birthday was on All Saints Day, which is November 1st. So I’m a little bit behind on this blog.

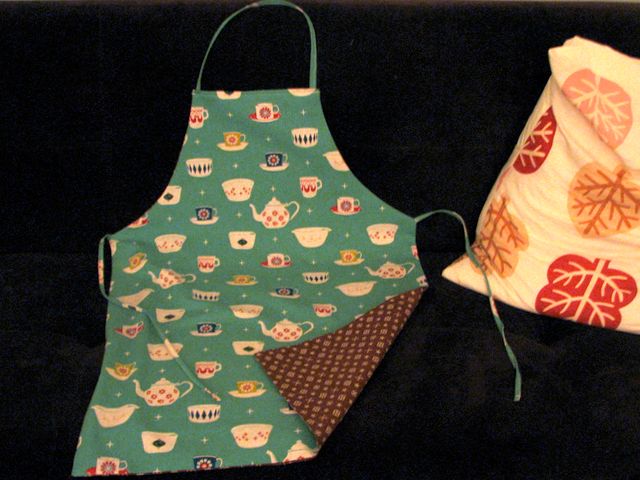
The apron was made using a jcaroline creative pattern that I used to for my friend Ruchi’s apron in 2008, but I made some executive decisions, as I’ve become a little bit better at sewing in three years. Instead of the raw side of the fabric ever showing, I made two aprons - one out of the main fabric and one out of contrasting fabric, and sewed them together so essentially the apron is reversible (though the main fabric so overwhelms the contrasting fabric in pleasantness that you wouldn’t ever want to reverse it). I also eliminated the pocket, because I don’t think people use pockets in aprons, though that’s just an assumption. I cook in pajamas and sometimes nothing at all and I don’t have pockets. The neck tie is also a loop rather than a tie, and instead of using ribbons for the neck tie and waist straps, I cut bias strips of the fabric and made the ties from the fabric itself by folding it in on itself several times and stitching down the length of it. Portland recycles.

Neck tie

The fabric, by the way, is the best. I bought it orginally for home decor purposes - I was just going to frame it because I’m a super lazy decorator, but I bought a little extra because I liked it that much. It’s a heavy cotton, almost like a canavs, but the pattern, colors, and the mood are just delightful, and perfect for Petra. I had more trouble finding a contrasting fabric to pair it with, but i went with a lightweight brown cotton with some charm elements (think Lucky Charms or Louis Vuitton…those types of icons). Nobody will really see the inside, but it was necessary.

fabric close up

There were some other design elements I was hoping to incorporate; piping and embroidery, but wasn’t confident in my skills to do so. Those are two skills I’d like to develop in the new year. I pretty much want to use piping and embroidery on every project and never do.

Tagged with fabric

H&M Hat

H&M Hat

My new hat. Have you seen my hat? Basically, I was in H&M and I saw a hat that I liked. I tried it on and I liked it even more. It was only $6! But I had near-identical yarn in my stash (at the time they were selling a yellow version for fall), and it was simple enough to recreate, so I did. I knit the hat in the first week of October and photographed it in the first week of November and now I am writing about it in the first week of December.

This hat is garter stitch - simple enough - but like Transformers, there’s more than meets the eye. The garter stitch doesn’t go back and forth, it goes up and down, which means this hat couldn’t simply be worked in the round and decreased at the top, it means it had to be provisionally cast on, worked flat back and forth with short row shaping toward the crown, and then grafted together.

There exists a pattern generator, Zeebee by Schmeebot, that will give you a similar hat, but with too much crown shaping for what I was trying to accomplish, so I used the concept behind this pattern to create my hat. The Zeebee pattern contains a lot of details, especially concerning technique and schematics. Here is how I made it:

  1. Using a provisional cast-on, cast on 25 stitches (this is the number of stitches I measured on the actual hat from H&M, but actually, I think 30 would be a more appropriate number of stitches to cast on with size 11 needles as I was using).
  2. Knit one row to the second to last stitch (this is toward the crown of the hat); wrap and turn
  3. Knit back toward the end of the work (toward the brim of the hat), turn
  4. Knit toward the third to last stitch, wrap and turn
  5. Knit toward the end of the work, turn
  6. Knit toward the crown; knit the first wrapped stitch you come across. Wrap the second stitch, turn
  7. Knit to the end of the row.
  8. Knit toward the crown; knit the first wrapped stitch you come across. Wrap the next stitch (the only remaining stitch on the needle), turn.
  9. Knit toward the end of the row.
  10. Repeat from step 2, and keep doing this until you feel the hat is wide enough to stretch across your head.
  11. Using the grafting technique, graft the ends of the hat together. Block into shape.

Wrap and turn more stitches for a more pronounced cup-shaped crown. I only worked three stitches.

If I could have done anything differently, I would have made it bigger overall - cast on more stitches, and worked one or two more repeats of the pattern.

H&M Hat

H&M Hat

Tagged with yarn

Toronto Travel Bag

Toronto Bag

Hello! I know this blog has been idle, but that doesn’t mean that I’ve been! I have an entire backlog of projects waiting to be documented. At the end of August I went to Toronto and created a very special bag for the occasion: a travel satchel that could essentially fit all the contents of my daily handbag, plus my MacBook Air. I had found the fabric for less than $2/yard at Knittn Kitten, a craft thrift store in Portland where I go to for notions and serendipitous finds. I love pairing charcoal gray and red, and that’s the only thing I like about this bag.

I’m not a perfectionist, so this bag was planned poorly, and made in haste. I took a “this is a prototype” approach to it, because it helps me get over the anxiety associated with creating anything. I knew that if I made more bags in this style, I could then use what I’ve learned while constructing this particular version in future iterations and perfect those items down the line. I’m not completely happy with the way this bag handles, but it accomplishes what a bag should, which is to hold stuff while not falling apart in Toronto.

This bag has walls and a bottom, which was something I’ve never put in my handbags before; typically, they’re tote style. I probably should have used very stiff interfacing for this part to help give it structure (I didn’t have any interfacing), in additon to making the walls and the bottom maybe 1/2” to 1” narrower, because the bag tends to feel saggy and bulky. This contributes largely to the unhappiness I feel when using this bag.

Photobombed by the guy in 512

The bag also has a messenger bag style strap that can adjust to be a shoulder bag, or an across-the-chest bag. This was my first time doing such a thing, and I was impressed with how easy it was while following this tutorial from You SEW, girl!. Here I am wearing it as a shoulder bag, while also being photobombed by a neighbor.

Toronto Bag

This bag also has two “lifestyle” features: an external pocket for a handheld mobile device (like a phone or mp3 player), and an internal sleeve for my MacBook Air, which separates it from the rest of the contents of the bag to keep it looking nice. The interior of the bag is maybe 1/16th of an inch too small in width for the Macbook Air, which means it’s fussy.

Toronto Bag Small Pocket

Lastly, this bag has a separate, smaller pocket for other personal items, like my 1 qt plastic bag full of lip gloss that I take with me when I travel.

Toronto Bag Interior
I love red and I love gray. I also love piquant linings.

Toronto Bag

Tagged with fabric