H&M Hat

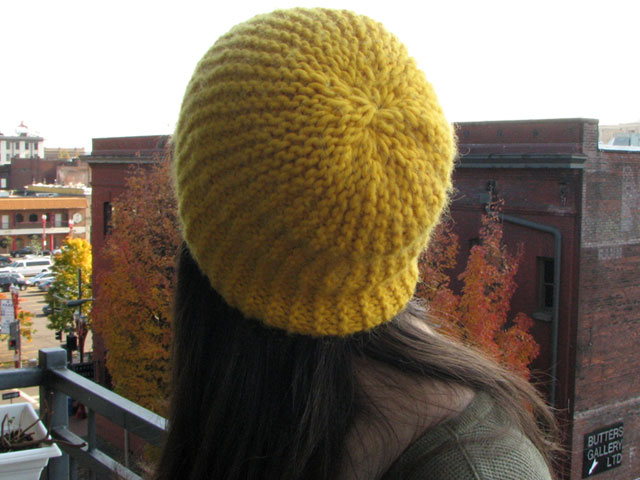
My new hat. Have you seen my hat? Basically, I was in H&M and I saw a hat that I liked. I tried it on and I liked it even more. It was only $6! But I had near-identical yarn in my stash (at the time they were selling a yellow version for fall), and it was simple enough to recreate, so I did. I knit the hat in the first week of October and photographed it in the first week of November and now I am writing about it in the first week of December.
This hat is garter stitch - simple enough - but like Transformers, there’s more than meets the eye. The garter stitch doesn’t go back and forth, it goes up and down, which means this hat couldn’t simply be worked in the round and decreased at the top, it means it had to be provisionally cast on, worked flat back and forth with short row shaping toward the crown, and then grafted together.
There exists a pattern generator, Zeebee by Schmeebot, that will give you a similar hat, but with too much crown shaping for what I was trying to accomplish, so I used the concept behind this pattern to create my hat. The Zeebee pattern contains a lot of details, especially concerning technique and schematics. Here is how I made it:
- Using a provisional cast-on, cast on 25 stitches (this is the number of stitches I measured on the actual hat from H&M, but actually, I think 30 would be a more appropriate number of stitches to cast on with size 11 needles as I was using).
- Knit one row to the second to last stitch (this is toward the crown of the hat); wrap and turn
- Knit back toward the end of the work (toward the brim of the hat), turn
- Knit toward the third to last stitch, wrap and turn
- Knit toward the end of the work, turn
- Knit toward the crown; knit the first wrapped stitch you come across. Wrap the second stitch, turn
- Knit to the end of the row.
- Knit toward the crown; knit the first wrapped stitch you come across. Wrap the next stitch (the only remaining stitch on the needle), turn.
- Knit toward the end of the row.
- Repeat from step 2, and keep doing this until you feel the hat is wide enough to stretch across your head.
- Using the grafting technique, graft the ends of the hat together. Block into shape.
Wrap and turn more stitches for a more pronounced cup-shaped crown. I only worked three stitches.
If I could have done anything differently, I would have made it bigger overall - cast on more stitches, and worked one or two more repeats of the pattern.