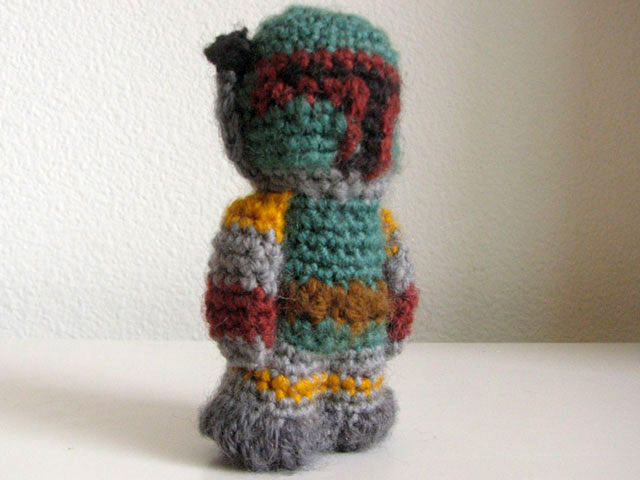
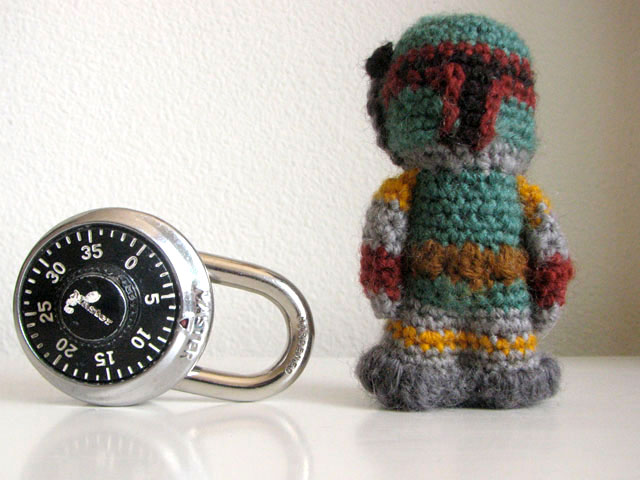
Tiny-Ass Boba Fett

Boba Fett
Hello to all! I crocheted a tiny-ass Boba Fett as a gift. I don’t know who Boba Fett is, but everyone keeps telling me he’s a pretty cool bad guy! The only Star Wars movie I’ve ever seen was The Phantom Menace. My dad dragged my ass to it when it came out and I fell asleep in a theater surrounded by people who actually had some context. Apparently it wasn’t even a good movie even if you DID know a thing about Star Wars.

This is not my first time at the amigurumi rodeo; at the beginning of 2010 I had this ambition to do an amigurumi figure a day and create this fantasy world of adorable, tiny, crocheted animals and anthropomorphic food. I did not pursue it completely, but now I think I should, considering I have a huge bag of stuffing and a bunch of doll eyes in my closet-that-I-turned-into-a-sewing-room.

Before starting, I was nervous that I would have to buy about seven balls of yarn - one for each color - only to use up a few meters of each and be left with a partial ball. This would have cost me a ridiculous amount of money, which is unacceptable. Then it occurred to me to use embroidery thread because I was using a slender crochet hook and I wanted a small figure. I went to The Playful Needle, which is an embroidery and cross-stitch store, and found, well, apparently it’s yarn intended to repair Persian rugs, according to the store owner.

Boba Fett

It’s basically a bunch of tiny skeins of several lengths of yarn each about 12” long. Each length was made up of three strands, each two-ply. Each three-stranded length was about the weight of fingering yarn. These were really affordable and I would definitely go this route if I decide to pursue my amigurumi menagerie. Futhermore, each length was made up of three strands, but I made Boba Fett using only two strands per length because three were too bulky and I initally DID end up with a big stupid doll. By reducing my weight to only two strands, I got extra length every three lengths by joining orphaned strands into two-stranded lengths so I could have gotten away with buying fewer skeins. I really appreciated being able to fine-tune the weight of the yarn I used because too thick a strand gives you a big amigurumi doll, reducing its cute factor and too thin a strand allows the stuffing to show through and forms a flimsy fabric. The only drawback was that it wasn’t one continuous THING of yarn, so they had to be connected using a felted join, which was very easy considering they were all 100% wool, but it was extra effort.

I crocheted this while finishing up Robert Heinlein’s The Moon is a Harsh Mistress and starting Tina Fey’s Bossypants on audio book (which, I’m going to assume is better than the print book because Tina Fey reads it herself and does voice impressions of SNL alum!). Audiobooks, seriously. I’ve always lamented that I don’t read anything because it’s such an active activity, and I always feel a little bit sad inside when my active activity involves consuming rather than creating (maker snob). Audiobooks connect me with reading again and allow me to multi-task. I’m really excited about this.

Boba Fett

Tagged with yarn

Old Coat, New Lining

New Coat Lining

Oh hi. Just because I haven’t posted anything all year doesn’t mean I haven’t been creative. And just because I haven’t displayed any knitted objects doesn’t mean I haven’t been knitting. I knit an entire ill-fitting cardigan that I literally threw out, 1/2 a sock for a man, the cuff of a mitten that I decided I wanted to turn into an iPod cozy, and half an iPod cozy that I decided I didn’t need. So I’ve been creative, but I haven’t been very successful.

So here’s a minor success I had at the end of February: I re-lined one of my winter coats (my other winter coat is very expensive, and won’t ever need re-lining. This one was $15 on Craigslist). The first thing I did to this coat when I got it in 2008 was switch out the boring plastic buttons for some more interesting metal ones. And then two years later, I re-lined it.

You can see the old lining here, as a cat struggles with his Christmas costume.

New Coat Lining

Unfortunately I don’t have any pictures of the process because there isn’t enough light to take photos by in Portland in February, but it went something like this:

  1. Use a seam ripper and take out all the lining pieces individually
  2. Reassemble them as they appear in the coat and number them so that you know what goes next to what (this one had eight or nine pieces, not including the sleeves.)
  3. Iron them!
  4. Trace them onto your new fabric, and remember that the direction of the fabric matters, so don’t try to be economical with the fabric and trace your pieces every which way. Go in order, and make sure they’re all oriented similarly.
  5. Cut out your pieces and pin them to their templates to keep organized
  6. Sew the sleeves first. Sew them into the damn coat.
  7. Now sew the body. Sew it into the damn coat.

That was probably not helpful at all, but the process is very intuitive. The hardest part is sewing the bottom hem. If your stitches aren’t even, there will be puckering. This is bad. Sorry I can’t give you tips on how to sew awesomely. I’m only average at it. This coat…it has some puckering.

As for fabric choice, I almost chose a corduroy fabric that was so damn cute, but corduroy is a bad choice because it has a high coefficient of friction. It’s better to choose like a nylon or something with synthetic character, so it’s easy to slip in and out of. I chose 100% cotton for my fabric, and it’s still a little grabby.

Immediately upon finishing this project I learned that my grandmother had died at a very young age and after being sick for a very long time. Hopefully you will have better luck if you ever decide to re-line your own coat.

New Coat Lining

New Coat Lining

New Coat Lining

Seaming queen, young and mean only 25.

New Coat Lining

Tagged with fabric

Anklet Socks

Anklet Socks

Hi! It’s January. My close friend Samantha had emailed me recently asking for my interpretation of some directions in a pattern for socks. The socks were so cute I had to knit them! Samantha has great taste. I knit them over New Years when I was sick. In the past 10 years I have spent 60% of my New Years Eves sick.

I added pom poms because I feel that all ankle socks should have them! Depending on which way you wear them the pom poms can be on the insides or outsides. I followed Bella Dia’s Pom Pom Tutorial that I’ve had bookmarked since 2006. It doesn’t require anything but your two fingers (no plastic rings and no makeshift cardboard or paper rings.)

Tagged with yarn